Check out my stats
How and why I hacked my exercise bike.
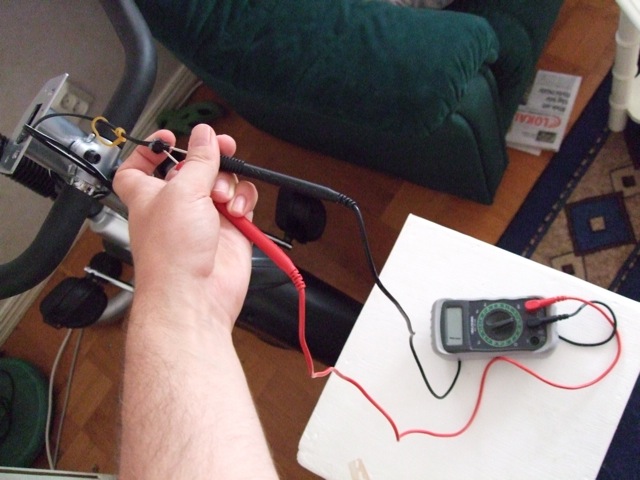
Imagine this: A 30 something bearded man in shorts with a multi-meter connected to cables out of an exercise bike trying to remain balanced an read the multi-meter at the same time as he is turning the pedals with one foot and listening to a beep from the multi-meter. My wife who did not have to imagine it asked "What are you doing?" and I can tell that my answer "isn't that obvious" wasn't really that great. So here it goes, all the details of how and why I hacked my exercise bike.
History:
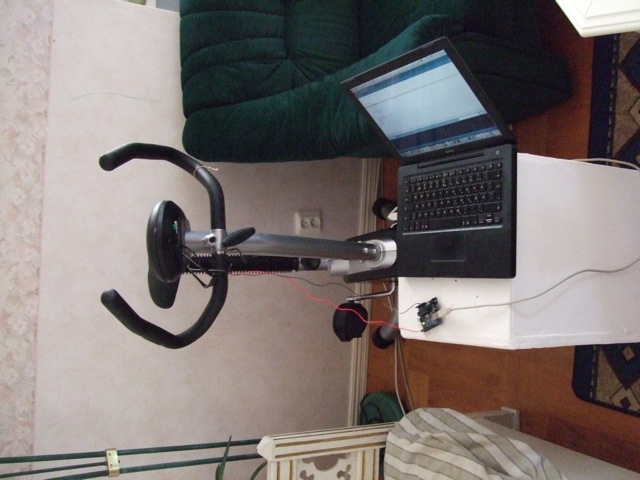
A while back I bought an Arduino together with the pocket piano shield. That was fun and all and I did create a little hardware synthesiser which you can watch at YouTube. Then recently work had a little workshop with David Cuartielles one of the creators of Arduino, and I got seriously interested in doing more with that Arduino I had at home. I also have an exercise bike that I bought with a little idea of perhaps hooking it up to the internets in some way. This is how I've done just that. Reverse engineered the bike's sensors and logic viahooking up my Arduino and reading it's sensors.
The hack:
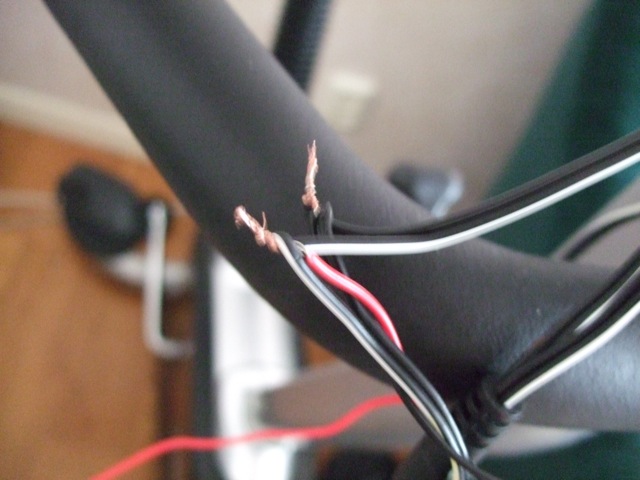
The bike came in a package and I had a fun 30 minutes assembling it with the kids. I noticed that there was one cable from the front "wheel" going up to the "computer". I'm going to continue saying "computer" with citation signs because its more of a display of plasticity then a real computer. Any-ways there was this cable and cables from the handlebars where metallic pieces where placed almost next to each others. I easily recognised the handlebar sensors as the pulse meters since you don't get pulse data if you don't have your hands on both. The pulse-meter works with reading the change in resistance of your skin. I think that when your blood pumps the resistance goes down causing a spike which can be read. I don't really care that much for the pulse-metering stuff so I ignored that.
Hooking the multi-meter to the cable from the wheel was easy since it had a connection with two metal parts on it. First I just wanted to se it there was a connection so I set my multi-meter to beep when there was a connection. It did beep when I moved the pedals, but it did not beep when the wheel where moving. I felt a bit cheated then. That meant that you could not go "downhill" so to say and accumulate distance like on a real bike :(. I also noticed that the on portion wasn't a single small place but rather perhaps ten degrees of the total 360 that the pedals can turn. I then figured that the "computer" that came with the bike perhaps didn't read it's input's fast enough and needed a longer period. Not a problem for the Arduino though. This was a few hours one night.
Then how to back-engineer the distance measurement? I realised that I didn't know how to connect to both the "computer" and the Arduino at the same time with feeding electricity from both. So I unhooked the "computer" and just used the Arduino. I cut the wire in two (actually four) and hooked those up to the Arduino instead. I also wrote a little program that reads the on/off from a pin on the circuit board. In fact in it's first form it was Exactly like the "button" example available at the Arduino site. I had strange problems though. since I didn't want the Arduino to count the on parts I did a little state machine. It didn't work. It should have, but it didn't. I actually spent a lot of time on this part. The cables I used where flaky and popped out of the Arduino sockets all the time. By the time I found some old pin connectors in the basement (from an old experiment) and soldered them on the cables I was pretty tired. And my
recreation of the state machine from the button sketch did not work. At this point I was frustrated and remembered something that David mentioned. A pull-up resistor. This was where I decided to read up on that "tomorrow". Another evening well spent.
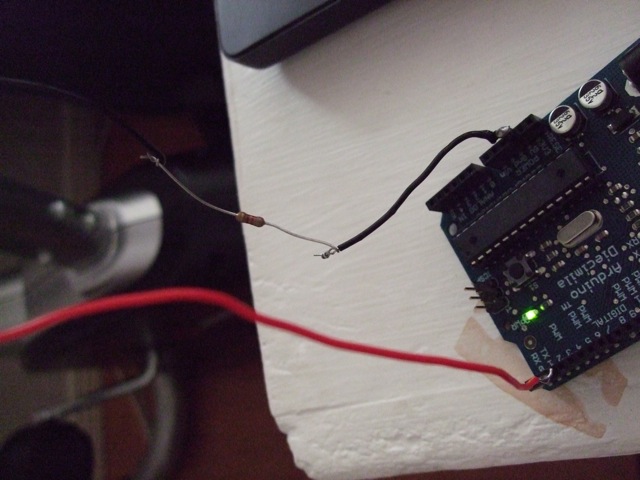
After reading up on that lazy electron I soldered the largest resistor I could find in my electronics scrap box on one of the cables. If it sounds like I have a lot of electronic components around the house that is partly true, I have done some circuit bending and there are sometimes leftovers from these experiments. I got a scare though, when connecting the Arduino with the pull-up and the connection to ground my computer flashed an error message that there was a current overload on the USB-hub. And since I'm on a macbook the hub is built in. After removing the cable to the ground it worked perfectly though (phuu). This must have been because I forgot to unplug the "computer", to much electricity running around because of that. Any-ways this means I can run the "computer" and the Arduino simultaneously. pretty sweet. and the state machine works splendidly.
Arduino Code:
| int
ledPin = 13; // LED int inputPin = 2; // choose the input pin (for a pushbutton) int val = 0; // variable for reading the pin status int lastval =0; //statemachine variable long counter =0; //dont want to owerflow if we'd like to use this for something later void setup() { pinMode(ledPin, OUTPUT); // declare LED as output pinMode(inputPin, INPUT); // declare pushbutton as input Serial.begin(9600); lastval=digitalRead(inputPin); } void loop() { val = digitalRead(inputPin); // read input value if (val!=lastval) { if (val == HIGH ) { digitalWrite(ledPin, LOW); // turn LED OFF } else { digitalWrite(ledPin, HIGH); // turn LED ON //print the value of the counter, not really used by the processing sketch anyways Serial.println(counter); counter++; //increase counter } lastval=val; } } |
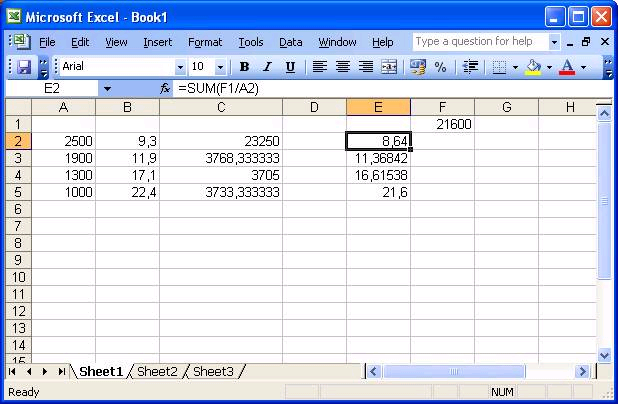
So now that I have the data, how to interpret it? Since I could use both the speed from the "computer" and the milliseconds that it takes to pedal one revolution and compare. This is where I found out that I've forgotten basic algebra. Seriously, I confused the hell out of myself with converting meters per milliseconds to kilometres per hour. Mostly because I at this point thought that one revolve was one meter (I did some tests at the point where I soldered the cables) and I could not for the life of me figure out what was wrong. A good night's sleep and a discussion with a colleague of mine I got it down correctly. I even did the corporate tie thing and created a excel sheet with my values so that I could get a factor more visible. This is the first time I've used excel for something meaningful outside of work in ... forever.
Firstly I've created a little processing-sketch that shows how long I've trained, how far I've pedalled and what speed I'm currently going at. But for now I'm thinking of what to continue with. Perhaps hook it p to Google earth and a route that would be sweet. Or maybe follow the path of Indiana Jones stylish flight paths (kind of long though). Or maybe take my exercise bike to the moon? but that is a goal I probably couldn't do in my expected lifetime (perhaps as a community project) for now I've settled for adding the statistics to a web server so I can keep my and show my data.
Processing Code
| import
processing.serial.*; import java.util.*; import java.text.*; Serial port; String buff = ""; int inval=0; int NEWLINE = 10; int myMillis=0; int firstMillis=0; int acculumatedMeters=0; float currentSpeed =0; String excerciseTime=""; PFont font; void setup() { size(640, 480); noStroke(); frameRate(10); // List all the available serial ports in the output pane. // You will need to choose the port that the Arduino board is // connected to from this list. The first port in the list is // port #0 and the third port in the list is port #2. println(Serial.list()); // Open the port that the Arduino board is connected to (in this case #0) // Make sure to open the port at the same speed Arduino is using (9600bps) port = new Serial(this, Serial.list()[0], 9600); font = loadFont("Optima-Regular-48.vlw"); } void keyReleased() { if (key=='s') { println("sendin to the internets"); excerciseTime =trim(excerciseTime); //there are better functions then link, but it does the job link("http://www.larsby.com/johan/secret/log.php?time="+excerciseTime+"& length="+(acculumatedMeters*6),"_new"); } } void draw() { while (port.available() > 0) { serialEvent(port.read()); } SimpleDateFormat sdf = new SimpleDateFormat(" HH:mm:ss"); Date resultdate = new Date((millis()-firstMillis)); resultdate.setHours(resultdate.getHours()-1); background(inval, inval, inval); textFont(font); text("km/h : "+currentSpeed, 20, 48); excerciseTime = sdf.format(resultdate); text("excercise time : "+ excerciseTime, 20, 48*2); text("distance : "+ (acculumatedMeters*6)/1000.0 + " Km", 20, 48*3); } void serialEvent(int serial) { // If the variable "serial" is not equal to the value for // a new line, add the value to the variable "buff". If the // value "serial" is equal to the value for a new line, // save the value of the buffer into the variable "val". if(serial != NEWLINE) { buff += char(serial); } else { buff = buff.substring(0, buff.length()-1); inval = Integer.parseInt(buff); buff = ""; int tempmillis=millis(); currentSpeed = (3600*6)/(tempmillis-myMillis); acculumatedMeters++; myMillis = tempmillis; } } |
Conclusion:
I've learned that I should retake high-school math. A bit about electrons. A bit about the Arduino and a lot about the shortcuts the designers of my exercise bike has taken. I've also learned that just because it's clear to you when you are listening to a beep from a multi-meter balancing next to your exercise bike, it's not necessarily clear to your wife.
Recreate the hack:
If you want to recreate the hack, that would be sweet, I've added all the code I've written here and loads of pictures as you can se. Please drop me an email if you recreate or extrapolate from this article. Good luck!