Yeah, I built one!
So I’ve been toying around with the ESP8266 wifi chip, and I also hate walking outside to check if the mail has arrived in my mailbox, also this one is old and does not look very nice.
Solution to this partly artificial problem?
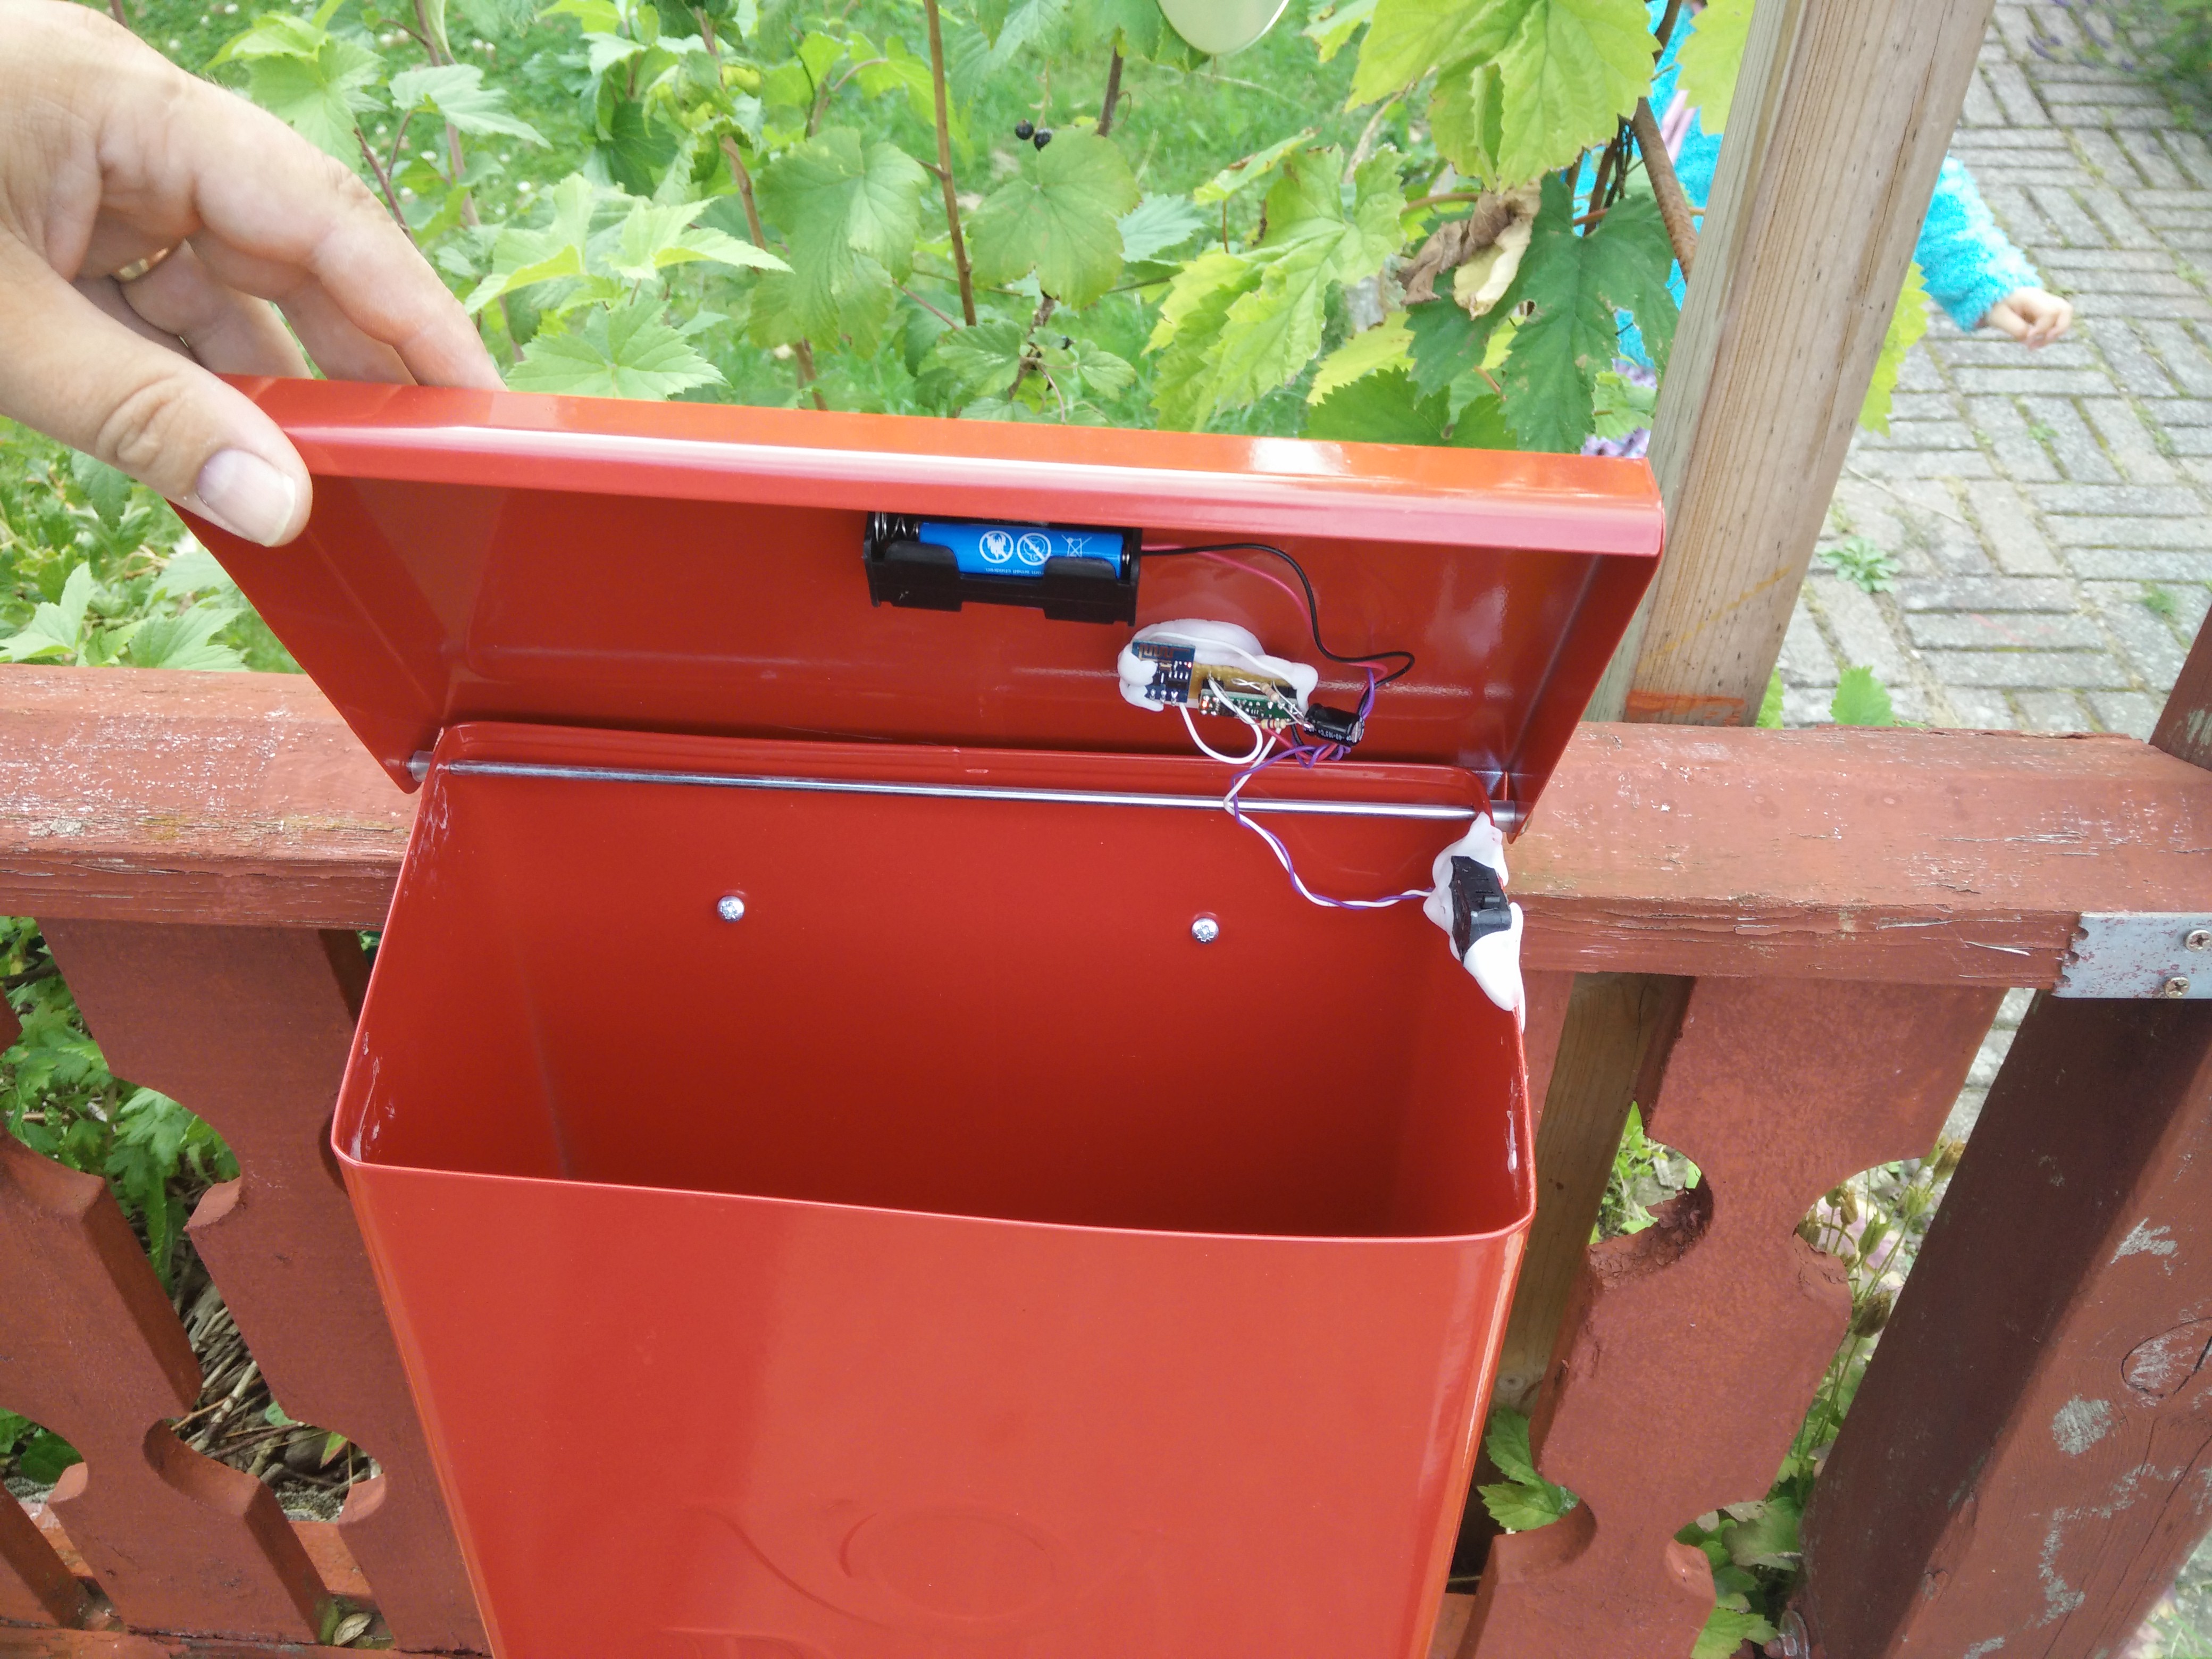
Use a ESP8266 to connect to my wifi every time the mailbox is opened, get a php page that downloads sends an email to me with the exact time the mailbox was opened.
I ran into a few snags, battery wise I want it to last forever, and ever. So decided to make the ESP turn itself off, that turned out harder then I thought and I had to get both additional hardware and also help.
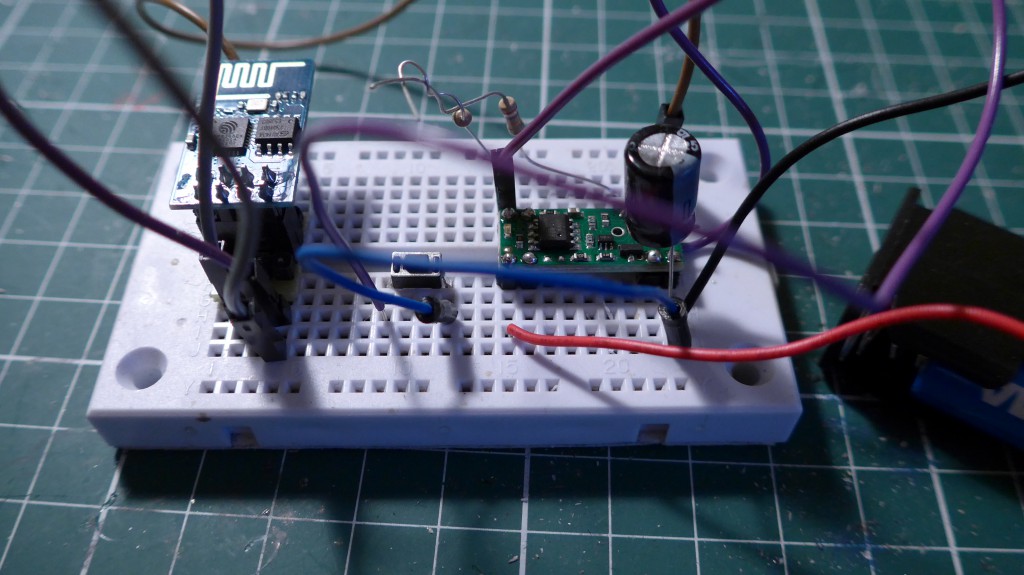
First things first though, the ESP8266 is running Arduino, so I thought that buying a https://www.sparkfun.com/products/8904 I could get the esp to tell the pushbutton power switch to turn itself off. And that worked to a degree. The boot time of EPS was to long and the pin had to be did not have time to change to a correct value so it immediately shut down. It’s a latching thing. That is when I got help, Jesper told me that I could make a ramp with a resistor and a capacitor and then he helped me calculate the values.
Long story short, I thought it would work, it didn’t, then I got help, and then it worked again.
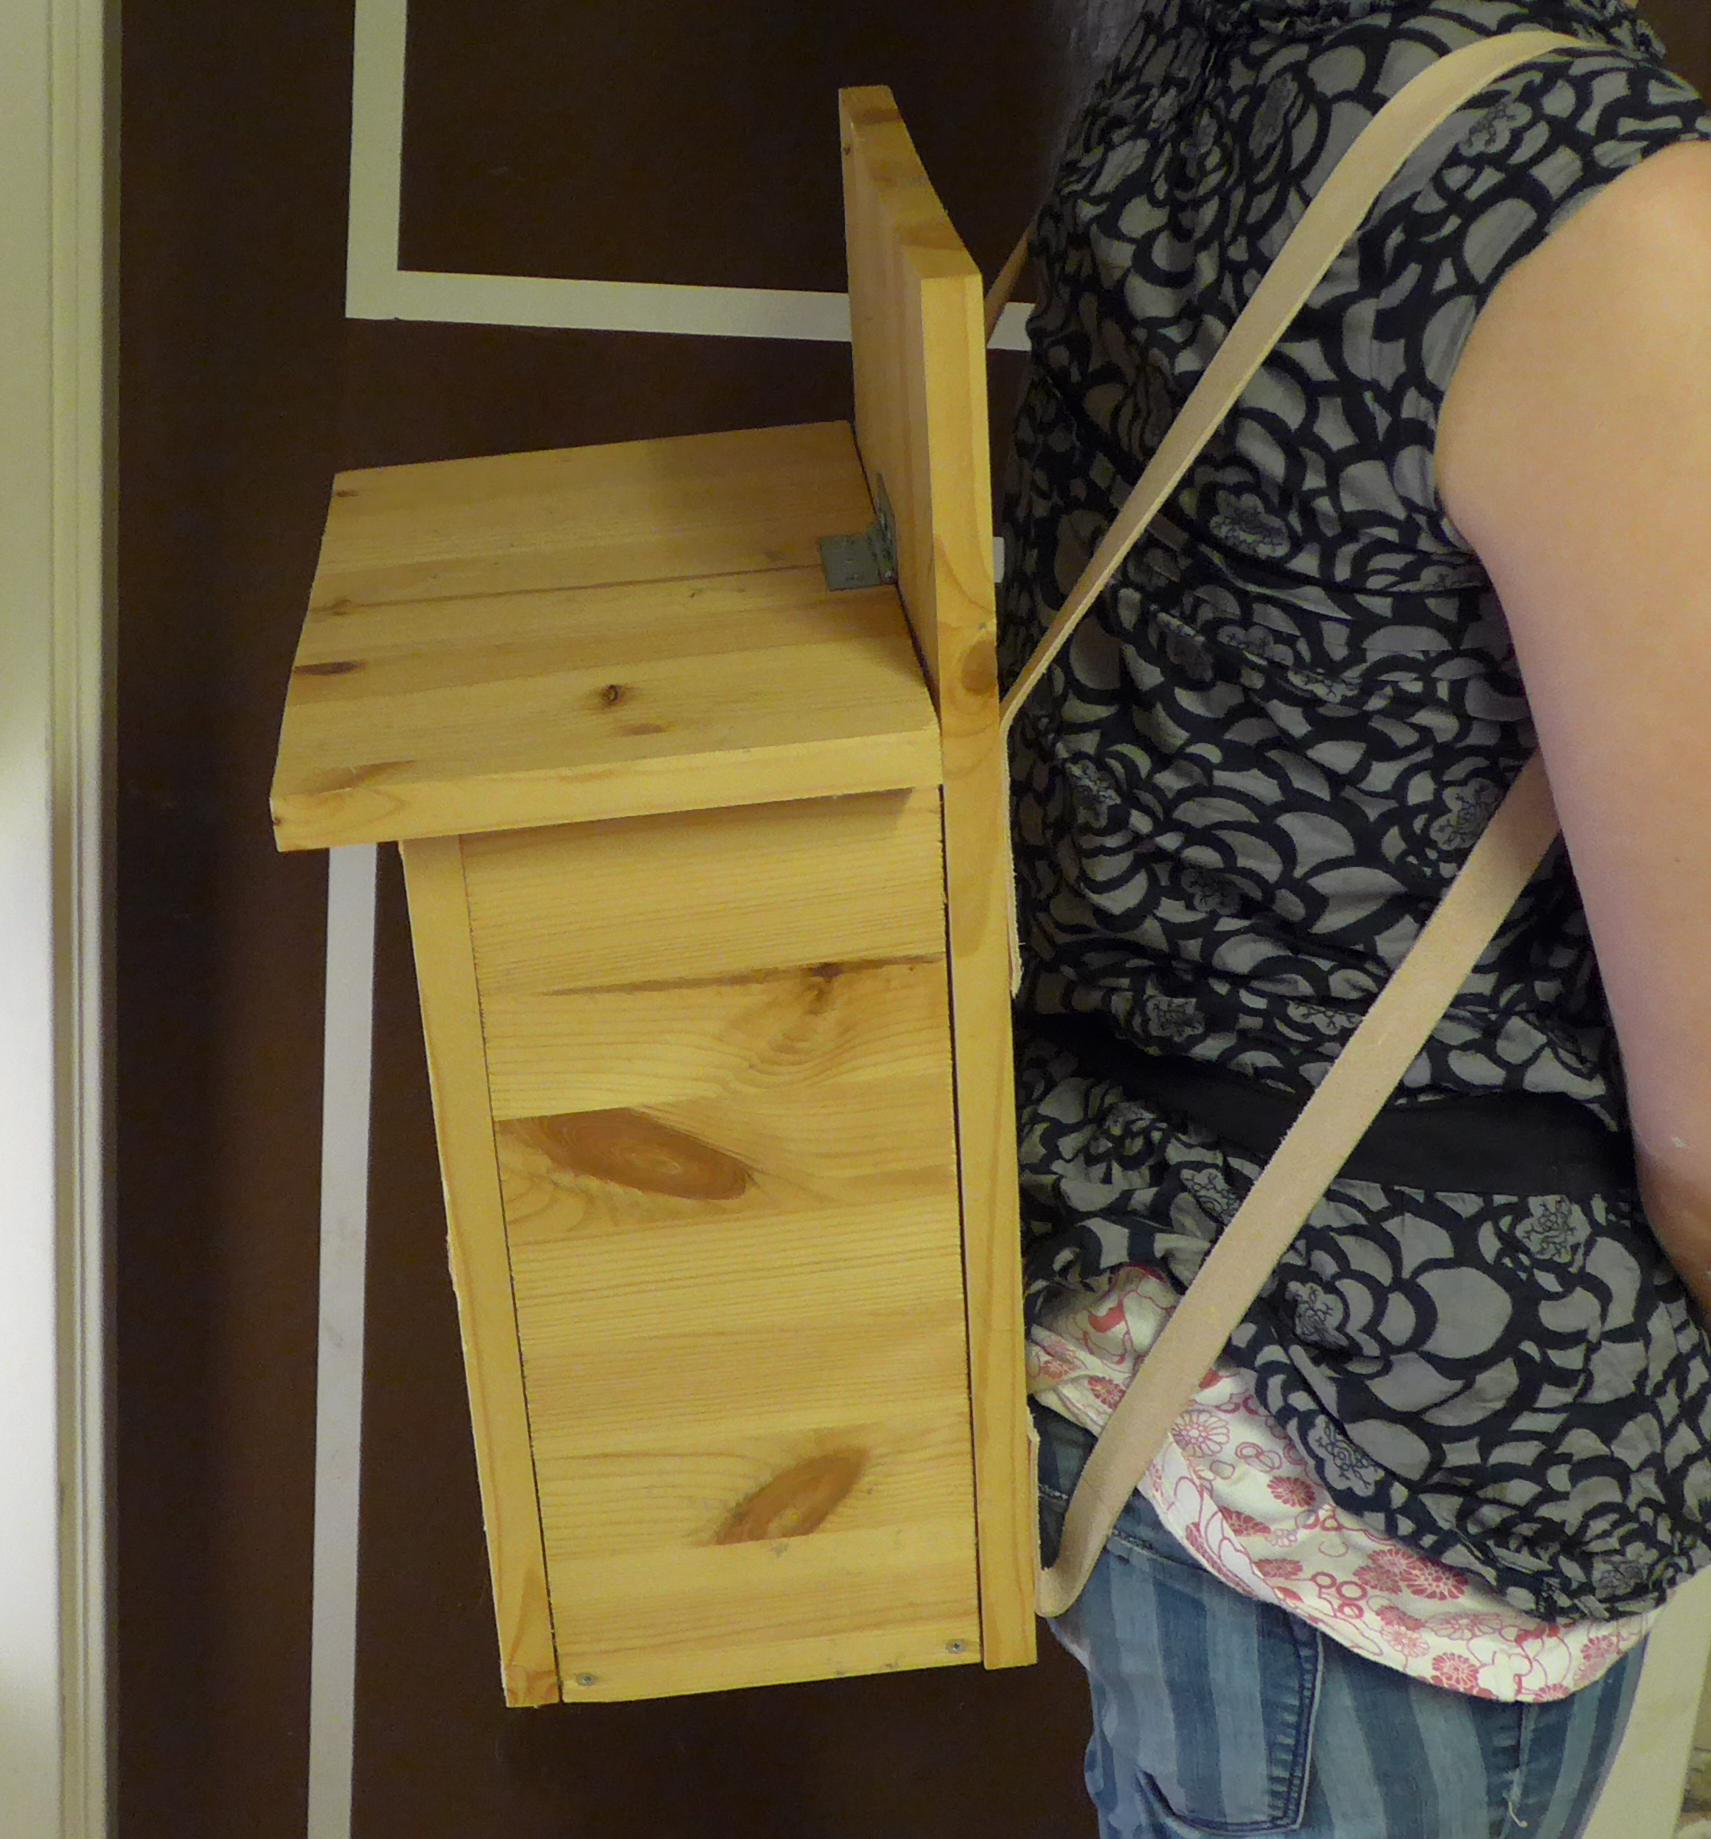
Was the way to my “no dry run utopia” without fail? No. It was actually full of fail. First I made a new mailbox with the kids, in wood. And I used BTLE to communicate from the mailbox. The wooden mailbox did not turn out as stylish as I hoped it would, so I bought the red metal one. BTLE did not reach the house, so that was also useless. Anyways onwards to the pretty pictures and actual code.
Hardware:
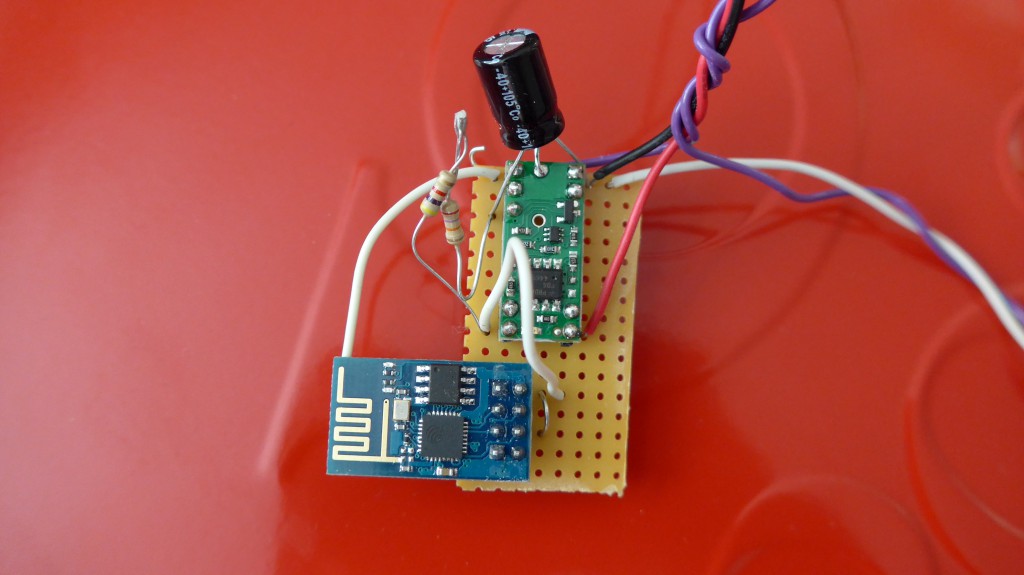
And then transferred to vero board and inside the new mailbox
Arduino code:
#include <ESP8266WiFi.h>
 const char* ssid = "LarsbyFiber";
 const char* password = "***********";
 const char* host = "www.maskelot.se";
 int outpin = 0;
 void setup() {

 //Pololu
 pinMode(outpin, OUTPUT);
 //Set digital pin 7 LOW. HIGH turns off the Pololu Pushbutton Power Switch
 digitalWrite(outpin,LOW);

 Serial.begin(115200);
 delay(10);
 // We start by connecting to a WiFi network
 Serial.println();
 Serial.println();
 Serial.print("Connecting to ");
 Serial.println(ssid);
 WiFi.begin(ssid, password);
 while (WiFi.status() != WL_CONNECTED) {
  delay(500);
  Serial.print(".");
  Serial.print(WiFi.status());
 }
 Serial.println("");
 Serial.println("WiFi connected");
 Serial.println("IP address: ");
 Serial.println(WiFi.localIP());
 delay(1000);
 Serial.print("connecting to ");
 Serial.println(host);
 // Use WiFiClient class to create TCP connections
 WiFiClient client;
 const int httpPort = 80;
 if (!client.connect(host, httpPort)) {
  Serial.println("connection failed");
  return;
 }
 // We now create a URI for the request
 String url = "/****.php";

 Serial.print("Requesting URL: ");
 Serial.println(url);
 // This will send the request to the server
 client.print(String("GET ") + url + " HTTP/1.1\r\n" +
 "Host: " + host + "\r\n" +
 "Connection: close\r\n\r\n");
 delay(500);
 // Read all the lines of the reply from server and print them to Serial
 while (client.available()) {
 String line = client.readStringUntil('\r');
 Serial.print(line);

 }
 Serial.println();
 Serial.println("closing connection");
 //Turning off
 Serial.println("Turning off.");
 digitalWrite(outpin,HIGH);
}
void loop() {
 //lol no!
}
PHP Code:
<?php

 $tz = 'Europe/Stockholm';
 $timestamp = time();
 $dt = new DateTime("now", new DateTimeZone($tz)); //first argument "must" be a string
 $dt->setTimestamp($timestamp); //adjust the object to correct timestamp

 $admin_email = "johan.larsby@maskelot.se";
 $email = "redbox@maskelot.se";
 $subject = "redbox opened at: " . $dt->format('d.m.Y, H:i:s');
 $comment = "";

 echo $admin_email;
 echo "<br>";
 echo $subject;
 echo "<br>";
 echo $email;
 echo "<br>";

 mail($admin_email, $subject, $comment, "From:" . $email);

 echo print_r(error_get_last());
?>
As an end I want to show you the wooden mailbox that we ended up converting to a very hipsterish backpack rather then using as a new mailbox. it’s available since I have all the backpacks I can use (holds a macbook pro 15″)
Hi, I love your mailbox alert but I’m spanish and I’m not sure I understood everything. It works fine? could you tell me the schematic with the resistors and capacitor?
Thanks.